MACROMEDIA FIREWORKS AND WEBSITE
Creating website couldn't be easier without fireworks, in this tutorial I am going to show you in a simple way and basic step you need to carry out and follow when dealing with task like "web page creation".
However, there are many tools out there with which you could come up with the same result though different approaches and level of complexity do varies with tool to be employed in executing your task.
Some like Photoshop, Dreamweaver, Visual Studio, and even Notepad++ could give what I am going show here, all of these depends on individual's learning strategies and the one that appeal comfortability
GET TO WORK
This tutorial will guide you through the basic tasks of designing and
creating a web page with Macromedia Fireworks 8. You’ll also learn to create
interactive elements such as buttons, rollovers, and pop-up menus.
I am going to walk you through the basic steps and do follow the step and at the bottom of the steps is the download link
STEP ONE
The image below is the complete webpage result from using macromedia Fireworks 8
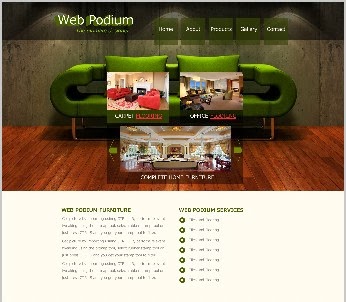 |
| Complete Result of Tutorial One |
- Create a folder for your web page, name it firework one
- Do a little sketching before embarking on designing or drawing anything on the frame
- With your sketch handy, you can really walk through the entire page with precision
 |
| Sketched map for web page |
4.Now that you have you map sketched, import background image and place it within first and second layer just to assume precision .
5. Save and proceed, if your imported image contain some unwanted object on it, use the rubber stamp tools to modify it.
6. Draw through the imported image a rectangle, ensure to maintain precision, let the drawn rectangle be filled with color black, and do some tweaking by referring to the properties pane at the bottom and set the blending mode to average. Save and proceed.
7.Now remember our assumed size is the desktop screen resolution with aspect ratio of 16:9 1366px by 768px. Recall the sketching mode as a reference to ensure correctness while placing elements, object and anything inside the frame.
8. Draw another rectangle, this time the height is set to appropriate size of 150px, fill it up as usual with fill tool and set its opacity to 0.5 or 50% .
9. With this in place, we are ready to play with the vector tool, select text tool and type whatever you fill like printing on the section for the title in this case i chose "web podium". If you love playing around with artistic media, styling of text let get to it .
10 Styling the text : To begin, you need to first identify which part of the text require specific treat for styling, in this case I am styling the entire title WEB PODIUM.
Different kind of task could be achieved when working with text like
Entering text
- Editing text
- Applying strokes, fills, and filters to text
- Attaching text to a path
- Transforming text
- Converting text to paths
- Importing text
- Checking spelling
- Using the Text Editor
For this task, we only need to enter, edit and apply filters to text . You can apply filter to your text by selecting filters from the properties pane at the bottom and mouse over shadow and glow to select solid shadow.
With solid shadow selected, a pop up properties would prompt you to tweak your solid shadow, select Solid color and set angle and distant to appropriate direction and size of your choice in this case I chose 208 degree and 16px respectively.
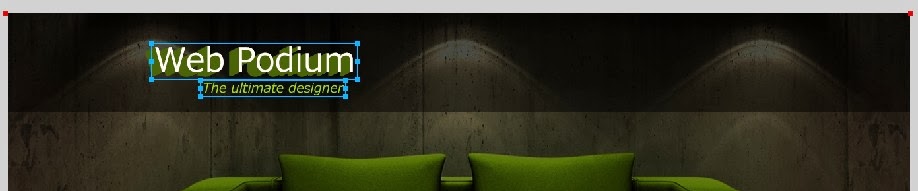 |
| Playing with Title and Tweaking |
11. Now we are done with that, lets work with Menu located on the right hand side of our map.
 |
| Menu placement on the menu block |
To maintain same precision in size and length, draw a small rectangular box and filled with "#96CD05", set the opacity to 0.5 and duplicate it across the section leave out small margin on both side of each like 10px and save. Enter your text in the box as shown below .
12 We are done with all tasks in the topmost layer save and proceed to middle layer. This layer as shown from the sketched map would house just three images and few embedded text, simple.
13. First draw inside your layout three rectangular boxes and maintain precision, having done that, import your images and place it in the space provided leave out some space from below to create text, save and proceed.
 |
| Three images embedded in boxes. |
14 Save and proceed to the lower layer containing the content for your web page. To work with this is so simple, just draw your rectangular box maintaining precise screen width of 1366 pixels and any reasonable height of your choice, fill it in with white color adjust it until contact with the middle layer edges and save.
15. With your sketch map handy, divide the bottom layer into equal size and and ensure to adjust both boxes that would house your text to be equally spaced from left and right respectively, the best way to get this is to stick to the rule of measurement set on your sketched map, that's all you need to do nothing more.
Enter your text and do a little bit of tweaking on the right to style your listed links and we are done with the graphic design.
The last part of this is rather not too simple but, easy if you follow the steps you are not going to be lost.
Now that we have the graphic saved, we need to prepare it to be exported to the web. In order to achieve this, following tasks has to be entertained.
- Create buttons for a navigation bar
- Create and edit a pop-up menu
THE TASKS
Slicing the document
Slicing is one of the techniques graphic designer employed in cutting big chunk of images into smaller pieces, this enable designers to better optimize various parts of the documents differently as it helps add more interactivity to the behavior of the web document.
Reason: This is indispensable as smaller images when sliced download quickly and load up fast when called unlike bigger images.
Top Layer
Before you embark on your slicing, you are required to identify which part of the graphic needs to be sliced for better optimization and also I suggest the best option is stick to your sketched map as a guide because it plays a crucial role in making fast slicing decision on your graphic
Insert a rectangular slice on top of the graphic from the left side, now we are starting from the top layer, the selected graphic is "title"
 |
Title ready for slicing
|
Creating Button ( Navigation Button)
Buttons are web objects that connect to other web pages when called. Their appearance could change with response to user mouse movement or any other invoked action ( Javascript, or Jquery e.t.c) such as clicking thus indicating seamless interactivity.
To create our button from the text menu, do follow the below step
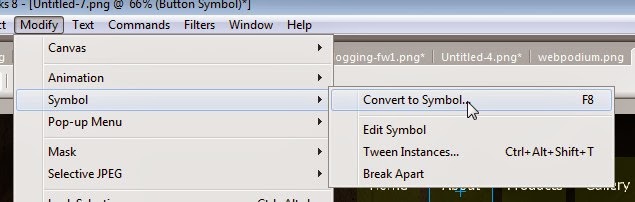
- Right click on any of the menu box or select modify like this
Modify ----> Symbol ---> Convert to Symbol
 |
| Creating Button |
Create Button States
Next you create various states for the button symbol. Button states are the
different ways a button appears when rolled over or clicked in a web
browse
 |
Button states panel
|
 |
| Action of roll over when UP is selected |
 |
| Action of roll over when OVER is selected |
Click the tabs at the top of the Button Editor.
- The first four tabs represent the button states. The last tab, Active Area,
represents the hot area on the button, or where a user must click or roll over
to activate the button states. The active area is also the swap area for the
button, or the area that changes with each button state. Currently there are no
states for the button symbol other than the Up state, the state of the button
before it is rolled over or clicked.
- Click the Over tab, and then click the Copy Up Graphic button.
The button graphic is copied from the Up tab. The Over state of a button is
its appearance when the pointer rolls over it. To give users visual feedback,
you decide to change the color of the rectangle behind the text.
- Select the rectangle on the Over tab, making sure you select the rectangle
and not the text.
To select the rectangle, select the Sub-selection tool (or press A) and hover
carefully over the left or right edges of the button graphic. The outlines of
two overlapping objects should appear. The rectangle has 4 selection points
while the text has 6 selection points. Carefully select the outline with 4
selection points. If the name of the object in the Property inspector is "Button
rectangle," you successfully selected the rectangle.
- Click the Fill Color box in the Property inspector and select black as the
color.
The rectangle is now black while the text remains white.
- Click the Down tab at the top of the Button Editor, and click the Copy Over
Graphic button.
The button graphic is copied from the Over tab. The Down state of a button is
its appearance after a user clicks it. This time you don’t change the color of
the rectangle; you leave it as it is.
- Click Done in the Button Editor to apply your changes to the button symbol.
- Click the Preview button in the Document window and test the button’s
states.
Disable slices if necessary. When you are finished, click the Original button
and enable slices again.
- Save your work.
Create multiple button instances
Next you create more instances of the button symbol.
- Select the button in the workspace if it isn’t already selected.
- Select Edit > Clone.
A new instance of the button appears on top of the original button.
- Hold down Shift while pressing the Right Arrow key repeatedly to move the
new instance to the right.
Holding down the Shift key moves the instance in 10-pixel increments. If
necessary, use the arrow keys alone to move the selection one pixel at a
time.
Position the instance to the immediate right of the original instance, but
not overlapping, as shown in the following illustration:
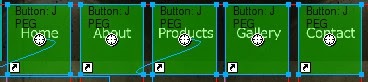 |
| Button Navigation Menu from clone |
- Change the button instances text to Home, about, products, gallery and Contact as shown above and assign respective URLS.
 |
| Button Instances Changed |
5. Repeat the same for the rest of the box and save your work.
Working with the Pop up Menu
Pop menu contains a list of items that link to other web pages, in this tutorial, we only need to apply pop up property to "Home" and "Product" menu, however you may change it in case you are dealing with your project.
Adding Pop Up Menu to Nav Bar
Select
Modify ---- Pop Up Menu --- Add Pop Up Menu
 |
| Select Pop up menu and choose add pop up menu |
 |
| Pop menu editor showing editable links |
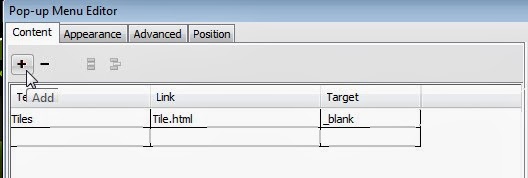
The figure below show three link columns ( Text, Link and Target), with this you can define how your link would behave when clicked and the target window, the row is an incremental one. To increase the row click on the cross + button to add more links to the menu.
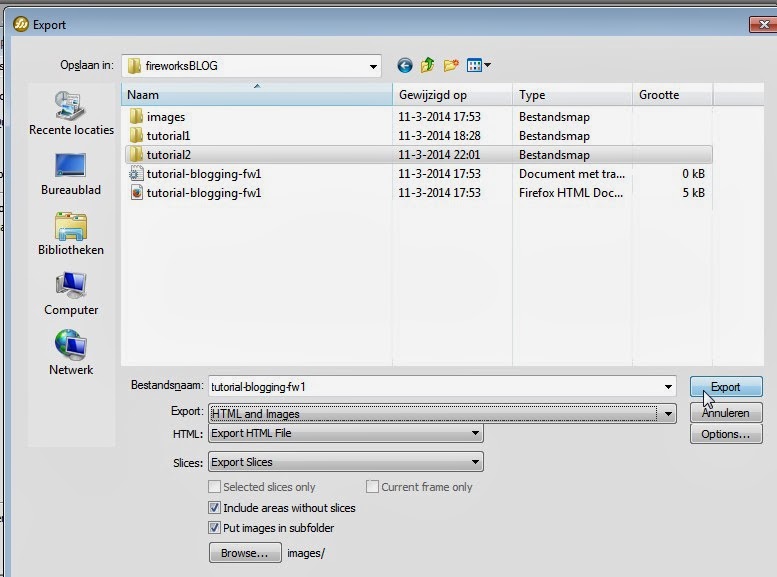
Options
- Export both HTML and Images
- Export HTML file
- Include areas without slices
- Put Images in subfolders
With these selected, hit the export button and you are completely done.
 |
| Export Options |
 |
| Exported Files and Folders |
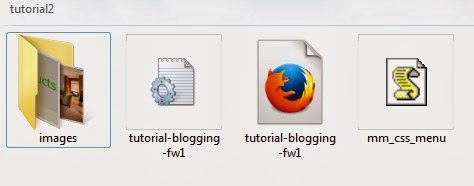
The resulted exporting files would be images, the css, the html file and the javascript.
Extending the project
Adding more pages .
Converting from static html to dynamic website.
Adding more functionality.
Converting it to more intense web application using PHP and MySQL.
Having problem with the above simple tutorial, leave your comment and you would be replied soonest.
Have fun!.